Android笔记—UI(一)
- 资料来源如下
- 第一行代码(第二版)
常用控件
TextView
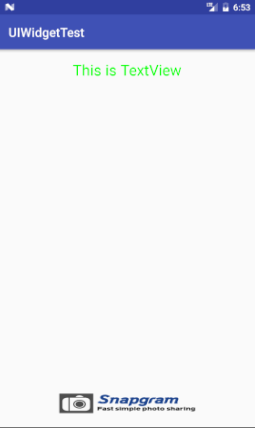
- TextView 显示文本信息
- ```
<TextViewandroid:id="@+id/text_view" android:layout_width="match_parent" android:layout_height="wrap_content" android:gravity="center" android:textSize="24sp" android:textColor="#00ff00" android:text="This is TextView" />1
2
3
4
5
6
7
8
9
10
11
12
13
14
15
16
17
18
19
20
21
22
23
24
25
26
27
28* 效果如下
#### 常用属性详解
* android:id 指定当前控件唯一标识符
* android:layout_width android:layout_height
指定控件的宽度和高度,取值有
* match_parent 匹配父布局
* wrap_content自适应内容
* fill_parent与match_parent 相同
* android:gravity 文字对齐方式,
可取值 top bottom left right center 可以使用 | 同时使用多个属性
* android:text 文本内容
* android:textSize android:textColor 文本的大小/颜色
### Button
* [Button](https://developer.android.com/reference/android/widget/Button.html) 按钮
* 代码
```xml
<Button
android:id="@+id/button"
android:layout_width="match_parent"
android:layout_height="wrap_content"
android:text="Button"
android:textAllCaps="false"/> - 效果如下
![2.png]()

常用属性
- android:textAllCaps 系统自动转换文本为大写 true/false
按钮响应(3种)
匿名类注册监听器
- 代码如下
1
2
3
4
5
6
7
8//新建Button对象 //强制类型转换
Button button = (Button)findViewById(R.id.button);
button.setOnClickListener(new View.OnClickListener(){
public void onClick(View v){
//添加逻辑
}
});
- 代码如下
接口方式实现
- 代码
1
2
3
4
5
6
7
8
9
10
11
12
13
14
15
16
17
18
19
20
21
22
23
24//继承接口
public class MainActivity extends AppCompatActivity implements View.OnClickListener{
protected void onCreate(Bundle savedInstanceState) {
super.onCreate(savedInstanceState);
setContentView(R.layout.activity_main);
//注册监听器
Button button = (Button)findViewById(R.id.button);
button.setOnClickListener(this);
}
//根据button id处理不同逻辑
public void onClick(View view){
switch (view.getId()){
case R.id.button:
//处理逻辑
break;
default:
break;
}
}
}
- 代码
android:onClick 匹配
在xml中指定android:onClick 指定的方法名称匹配,签名必须完全相同
方法要求:EditText
代码如下
1
2
3
4
5
6<EditText
android:id="@+id/edit_text"
android:layout_width="match_parent"
android:layout_height="wrap_content"
android:hint="输入文字"
android:maxLines="2"/>效果
![ScreenShot_20161210102606.png]()
常用属性
android:hint 指定一些提示性文字,再用户未输入时提示。
android:maxLines 输入内容最大占用行数

提取输入文本
- 通过findViewById找到EditText 实例,在处理逻辑中调用EditText.getText方法得到输入内容,再由toString转换为字符串。
- 代码如下
1
2
3
4
5
6
7
8
9
10//新建EditTExt对象
private EditText editText;
//绑定EditText实例
editText = (EditText)findViewById(R.id.edit_text);
//提取文本
String inputText = editText.getText().toString();
//Toast显示
Toast.makeText(MainActivity.this,inputText,Toast.LENGTH_SHORT).show();
ImageView
- 将图片放入drawable-xhdpi文件夹
- ImageView
- 代码
1
2
3
4
5<ImageView
android:id="@+id/image_view"
android:layout_width="wrap_content"
android:layout_height="wrap_content"
android:src="@drawable/img_1"/> - 效果如下
![ScreenShot_20161211142408.png]()

常用属性
- android:src 引用资源位置
更改ImageView图片
- 调用 imageView.setImageResource()方法
- 代码如下
1
2
3
4
5private ImageView imageView;
imageView = (ImageView)findViewById(R.id.image_view);
imageView.setImageResource(R.drawable.img_2);
ProgressBar
- ProgressBar
- 代码如下
1
2
3
4
5
6<ProgressBar
android:id="@+id/progress_bar"
android:layout_width="match_parent"
android:layout_height="wrap_content"
style="?android:attr/progressBarStyleHorizontal"
android:max="100"/> ![ScreenShot_20161211143148.png]()

常用属性
- android:visibility 是否可见 取值 visible invisible gone
- style=”?android:attr/progressBarStyleHorizontal”
android:max=”100”
设定显示方式为横向进度条,进度条最大值100
进度条有关设置
- 显示/隐藏进度条
progressBar.setVisibility()方法1
2
3
4
5
6
7
8
9
10
11private ProgressBar progressBar;
progressBar = (ProgressBar)findViewById(R.id.progress_bar);
//设置ProgressBar
if(progressBar.getVisibility() == View.GONE){
progressBar.setVisibility(View.VISIBLE);
} else {
progressBar.setVisibility(View.GONE);
} - 设置进度条进度
1
2
3int progress = progressBar.getProgress();
progress +=10;
progressBar.setProgress(progress);
AlertDialog
- AlertDialog
- 代码如下
1
2
3
4
5
6
7
8
9
10
11
12
13
14
15
16
17
18AlertDialog.Builder dialog = new AlertDialog.Builder(MainActivity.this);
dialog.setTitle("This is Dialog");
dialog.setMessage("something important");
dialog.setCancelable(false);
//setPositiveButton设定OK点击事件
dialog.setPositiveButton("OK",new DialogInterface.OnClickListener(){
public void onClick(DialogInterface dialog,int which){
}
});
//setNegativeButton设定Canncel点击事件
dialog.setNegativeButton("Canncel",new DialogInterface.OnClickListener(){
public void onClick(DialogInterface dialog,int which){
}
});
//显示 AlertDialog
dialog.show(); ![ScreenShot_20161211195720.png]()

ProgressDialog
ProgressDialog与AlertDialog类似,但是会额外显示一个进度条
代码如下
1
2
3
4
5
6
7
8
9
10//新建ProgressDialog对象
ProgressDialog progressDialog = new ProgressDialog(MainActivity.this);
//设置标题
progressDialog.setTitle("This is ProgressDialog");
//设置内容
progressDialog.setMessage("Loading...");
//是否可以返回键取消
progressDialog.setCancelable(false);
//显示
progressDialog.show();效果如图
![ScreenShot_20161211200629.png]()
PS:progressDialog.setCancelable();属性设置为false时表示ProgressDialog无法通过Back键取消。只能通过progressDialog.dismiss()方法取消

四种基本布局
LinearLayout 线性布局
- 线性方向上依次排列
- 基础效果如下
1
2
3
4
5
6
7
8
9
10
11
12
13
14
15
16
17
18
19
20
21
22
23
24
25
26<LinearLayout xmlns:android="http://schemas.android.com/apk/res/android"
xmlns:tools="http://schemas.android.com/tools"
android:id="@+id/activity_main"
android:orientation="horizontal"
android:layout_width="match_parent"
android:layout_height="match_parent"
tools:context="ljy.com.uilayouttest.MainActivity">
<Button
android:id="@+id/button_1"
android:layout_width="wrap_content"
android:layout_height="wrap_content"
android:text="Button_1"/>
<Button
android:id="@+id/button_2"
android:layout_width="wrap_content"
android:layout_height="wrap_content"
android:text="Button_2"/>
<Button
android:id="@+id/button_3"
android:layout_width="wrap_content"
android:layout_height="wrap_content"
android:text="Button_3"/>
</LinearLayout>基础属性
- android:orientation LinearLayout 的排列方向,取值有两种 horizontal横向和vertical竖向,不指定 android:orientation时,默认 horizontal
- android:layout_gravity _指定控件在布局中的对齐方式。该属性与 LinearLayout 的排列方向有很大关系。
- android:layout_weight _允许使用比例方式指定控件大小,计算控件大小时,系统非将所有控件的android:layout_weight _值相加,当作基底,计算指定的大小比例
- EditText和Button
常见用法1
2
3
4
5
6
7
8
9
10
11
12
13<EditText
android:id="@+id/button_1"
android:layout_width="0dp"
android:layout_height="wrap_content"
android:layout_weight="1"
android:hint="Button_1"/>
<Button
android:id="@+id/button_2"
android:layout_width="0dp"
android:layout_height="wrap_content"
android:layout_weight="1"
android:text="Button_2"/>![ScreenShot_20161213100420.png]()
指定android:layout_width _为0dp,android:layout_weight=”1”均为1 _平分大小 - 另一种用法将Button的android:layout_width设定为wrap_content,EditText 的android:layout_weight=”1”,EditText会占满整个屏幕剩余部分,在适配屏幕时较常用_
1
2
3
4
5
6
7
8
9
10
11
12<EditText
android:id="@+id/button_1"
android:layout_width="0dp"
android:layout_height="wrap_content"
android:layout_weight="1"
android:hint="Button_1"/>
<Button
android:id="@+id/button_2"
android:layout_width="wrap_content"
android:layout_height="wrap_content"
android:text="Button_2"/>
- EditText和Button

RelativeLayout相对布局
- 属性较多,以代码形式说明
相对父布局位置
- 代码如下
1
2
3
4
5
6
7
8
9
10
11
12
13
14
15
16
17
18
19
20
21
22
23
24
25
26
27
28
29
30
31
32
33
34
35
36
37
38
39
40
41
42
43
44<RelativeLayout xmlns:android="http://schemas.android.com/apk/res/android"
xmlns:tools="http://schemas.android.com/tools"
android:id="@+id/activity_main"
android:orientation="horizontal"
android:layout_width="match_parent"
android:layout_height="match_parent"
tools:context="ljy.com.uilayouttest.MainActivity">
<Button
android:id="@+id/button_1"
android:layout_width="wrap_content"
android:layout_height="wrap_content"
android:layout_alignParentLeft="true"
android:layout_alignParentTop="true"
android:text="Button 1"/>
<Button
android:id="@+id/button_2"
android:layout_width="wrap_content"
android:layout_height="wrap_content"
android:layout_alignParentRight="true"
android:layout_alignParentTop="true"
android:text="Button 2"/>
<Button
android:id="@+id/button_3"
android:layout_width="wrap_content"
android:layout_height="wrap_content"
android:layout_centerInParent="true"
android:text="Button 3"/>
<Button
android:id="@+id/button_4"
android:layout_width="wrap_content"
android:layout_height="wrap_content"
android:layout_alignParentBottom="true"
android:layout_alignParentLeft="true"
android:text="Button 4"/>
<Button
android:id="@+id/button_5"
android:layout_width="wrap_content"
android:layout_height="wrap_content"
android:layout_alignParentBottom="true"
android:layout_alignParentRight="true"
android:text="Button 5"/>
</RelativeLayout> ![ScreenShot_20161213102007.png]()
- android:layout_alignParentLeft=”true”
android:layout_alignParentTop=”true”
android:layout_centerInParent=”true”
android:layout_alignParentBottom=”true”
android:layout_alignParentRight=”true”
_简而言之这些属性指定了控件相对父布局的位置

相对控件位置
代码如下
1
2
3
4
5
6
7
8
9
10
11
12
13
14
15
16
17
18
19
20
21
22
23
24
25
26
27
28
29
30
31
32
33
34
35
36
37
38
39
40
41
42
43
44
45<RelativeLayout xmlns:android="http://schemas.android.com/apk/res/android"
xmlns:tools="http://schemas.android.com/tools"
android:id="@+id/activity_main"
android:orientation="horizontal"
android:layout_width="match_parent"
android:layout_height="match_parent"
tools:context="ljy.com.uilayouttest.MainActivity">
<Button
android:id="@+id/button_3"
android:layout_width="wrap_content"
android:layout_height="wrap_content"
android:layout_centerInParent="true"
android:text="Button 3"/>
<Button
android:id="@+id/button_1"
android:layout_width="wrap_content"
android:layout_height="wrap_content"
android:layout_above="@id/button_3"
android:layout_toLeftOf="@id/button_3"
android:text="Button 1"/>
<Button
android:id="@+id/button_2"
android:layout_width="wrap_content"
android:layout_height="wrap_content"
android:layout_above="@id/button_3"
android:layout_toRightOf="@id/button_3"
android:text="Button 2"/>
<Button
android:id="@+id/button_4"
android:layout_width="wrap_content"
android:layout_height="wrap_content"
android:layout_below="@id/button_3"
android:layout_toLeftOf="@id/button_3"
android:text="Button 4"/>
<Button
android:id="@+id/button_5"
android:layout_width="wrap_content"
android:layout_height="wrap_content"
android:layout_below="@id/button_3"
android:layout_toRightOf="@id/button_3"
android:text="Button 5"/>
</RelativeLayout>![ScreenShot_20161213103016.png]()
说明
- android:layout_above 可以指定一个控件位于指定控件的上方,需要指定ID引用
- android:layout_below 指定一个控件位于指定控件的下方,id引用
- android:layout_toLeftOf 指定一个控件位于指定控件的左侧,id引用
- android:layout_toRightOf 指定一个控件位于指定控件的右侧,id引用。
NOTE:当控件去引用另一个控件的ID时,引用控件一定要在前本例中是id/button_3在最前面_

FrameLayout帧布局
所有控件默认左上角
代码如下
两个控件重合1
2
3
4
5
6
7
8
9
10
11
12
13
14<FrameLayout xmlns:android="http://schemas.android.com/apk/res/android"
android:layout_width="match_parent"
android:layout_height="match_parent">
<TextView
android:id="@+id/text_view"
android:layout_width="wrap_content"
android:layout_height="wrap_content"
android:text="TextView"/>
<ImageView
android:id="@+id/image_view"
android:layout_width="wrap_content"
android:layout_height="wrap_content"
android:src="@mipmap/ic_launcher"/>
</FrameLayout>![ScreenShot_20161213113149.png]()
android:layout_gravity _同样可以应用于FrameLayout中,指定对齐方式

PercentFrameLayout百分比布局
- PercentFrameLayout并非内置于系统SDK中,使用前要在build.gradle中添加百分比布局的依赖。
- 修改app/build.gradle文件,在dependencies闭包中增加依赖。修改完成后,as会开始同步,同步完成即可。
1
2
3
4
5
6
7
8
9
10dependencies {
compile fileTree(dir: 'libs', include: ['*.jar'])
androidTestCompile('com.android.support.test.espresso:espresso-core:2.2.2', {
exclude group: 'com.android.support', module: 'support-annotations'
})
compile 'com.android.support:appcompat-v7:25.0.1'
//下面一行为增加内容,要与上面的版本号保持一致
compile 'com.android.support:percent:25.0.1'
testCompile 'junit:junit:4.12'
}
PercentFrameLayout继承了FrameLayout的特性,所有控件默认左上角,需要通过android:layout_gravity _来调整位置
源码如下
1
2
3
4
5
6
7
8
9
10
11
12
13
14
15
16
17
18
19
20
21
22
23
24
25
26
27
28
29
30
31
32
33
34# PercentFrameLayout 并非系统内置SDK,需要声明完整包路径
<android.support.percent.PercentFrameLayout
# 随后定义app的命名空间
xmlns:android="http://schemas.android.com/apk/res/android"
xmlns:app="http://schemas.android.com/apk/res-auto"
android:layout_width="match_parent"
android:layout_height="match_parent">
<Button
android:id="@+id/button1"
android:text="Button1"
android:layout_gravity="left|top"
app:layout_widthPercent="50%"
app:layout_heightPercent="50%"/>
<Button
android:id="@+id/button2"
android:text="Button2"
android:layout_gravity="right|top"
app:layout_widthPercent="50%"
app:layout_heightPercent="50%"/>
<Button
android:id="@+id/button3"
android:text="Button3"
android:layout_gravity="left|bottom"
app:layout_widthPercent="50%"
app:layout_heightPercent="50%"/>
<Button
android:id="@+id/button4"
android:text="Button4"
android:layout_gravity="right|bottom"
app:layout_widthPercent="50%"
app:layout_heightPercent="50%"/>
</android.support.percent.PercentFrameLayout>效果如图
![ScreenShot_20161213145134.png]()
与之类似的还有 PercentRelativeLayout,用法不加累赘

自定义控件
引入布局
- 新建title.xml
1
2
3
4
5
6
7
8
9
10
11
12
13
14
15
16
17
18
19
20
21
22
23
24
25
26
27
28
29
30
31
32
33
34
35
36
37<LinearLayout xmlns:android="http://schemas.android.com/apk/res/android"
android:layout_width="match_parent"
android:layout_height="wrap_content"
android:background="@drawable/title_bg">
<Button
android:id="@+id/title_back"
android:layout_width="wrap_content"
android:layout_height="wrap_content"
android:layout_gravity="center"
android:layout_margin="5dp"
android:background="@drawable/back_bg"
android:text="Back"
android:textColor="#fff" />
<TextView
android:id="@+id/title_text"
android:layout_width="0dp"
android:layout_height="wrap_content"
android:layout_gravity="center"
android:layout_weight="1"
android:gravity="center"
android:text="Title Text"
android:textColor="#fff"
android:textSize="24sp" />
<Button
android:id="@+id/title_edit"
android:layout_width="wrap_content"
android:layout_height="wrap_content"
android:layout_gravity="center"
android:layout_margin="5dp"
android:background="@drawable/edit_bg"
android:text="Edit"
android:textColor="#fff" />
</LinearLayout> - 在activity_main.xml _中使用title.xml
<include layout="@layout/title"/> - 隐藏系统自带标题栏,在mainActivity的onCreat中添加如下代码。
1
2
3ActionBar actionBar = getSupportActionBar();
if (actionBar != null)
actionBar.hide(); - 效果如下
![ScreenShot_20161213182554.png]()

自定义控件
- 创建TitleLayout继承自LinearLayout ,代码如下
1
2
3
4
5
6
7
8
9public class TitleLayout extends LinearLayout {
//构造函数
public TitleLayout(Context context, AttributeSet attributeSet){
super(context,attributeSet);
//调用LayoutInflater.from方法构建LayoutInflater对象,
//再调用inflate加载布局文件
LayoutInflater.from(context).inflate(R.layout.title,this);
}
} - 再activity_main.xml _中 添加自定义控件,
添加自定义控件时要指明控件的完整类名1
2
3<ljy.com.uicustomviews.TitleLayout
android:layout_width="match_parent"
android:layout_height="wrap_content"/> - 效果与引入布局文件相同
注册按钮点击事件
- 在TitleLayout的构造函数添加按钮注册点击事件
1
2
3
4
5
6
7
8
9
10
11
12
13
14
15
16
17Button titleBack = (Button)findViewById(R.id.title_back);
Button titleEdit = (Button)findViewById(R.id.title_edit);
titleBack.setOnClickListener(new OnClickListener() {
public void onClick(View v) {
//模拟返回键
((Activity)getContext()).finish();
}
});
titleEdit.setOnClickListener(new OnClickListener() {
public void onClick(View v) {
//Toast通知
Toast.makeText(getContext(),"clik",Toast.LENGTH_SHORT).show();
}
});
相关文章